


In his latest article, ELT pronunciation expert Adrian Underhill looks at the ways in which pronunciation can be integrated into your day-to-day classroom work
We all know that pronunciation does not get the same attention as grammar and vocabulary in our training, materials and class work. I call pronunciation the ‘Cinderella of ELT’ because it is so vital yet so neglected, but so much fun when fully explored in the teaching/learning mix. Here are my top tips for changing that and properly integrating pronunciation into the classroom environment.
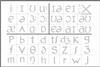
You need a pronunciation chart and a pointer. Why?
You would not teach grammar, vocabulary or skills without a whiteboard and pen, or a blackboard and chalk. The pronunciation chart is simply the whiteboard of pronunciation. And the pointer is the pen. The chart gives you a pronunciation workplace – an all-in-one view of the sounds, with a visual reminder of how they are made. So use the onestopenglish phonemic chart and always have it visible at the front of the class, just as you always have the whiteboard visible. I stick the chart on the whiteboard in every lesson.
Pronunciation at the point of purchase!
Every time learners meet a new word or phrase they should be taught the new pronunciation at the same time. If this does not happen, learners will start to process the new item in the only pronunciation available to them: their mother tongue. This will take energy to unlearn later on and is inefficient. Dealing with pronunciation later in a special pronunciation slot is too late, as incorrect memory connections have already been made.
We are not teaching the symbols – we are teaching sounds
We are not teaching the chart, just as we are not teaching the whiteboard. It is a tool that helps us do something else. We are also not teaching the symbols, though they get picked up quickly. We are teaching the experience of making and changing sounds – often a bit differently from the mother tongue sounds – and joining them up into a connected flow.
Putting the chart into circulation
The chart is part of what helps us integrate pronunciation with all other classroom activities, be they skills, grammar or vocabulary focused. Therefore, we first need to put the chart into circulation so learners can see how it is used and get used to using it. We can then use it to introduce pronunciation in every class activity, assimilating it with each bit of language for the rest of our learners’ English journey.
If possible, I suggest exploring all the sounds, either in the first lesson with your new group (this is what I do), or instead in the first two or three lessons. Remember, all the sounds are needed from the beginning and, unlike grammar and vocabulary, there is no set syllabus for sounds.
Here’s one way of putting the chart into circulation. Adapt it for your circumstances:
- Ask each student to say their name aloud as pronounced in their L1.
- Next, ask them to try and say their name as a native English speaker might. Often they can do this easily. It is fun, energizing and immediately puts into circulation the experience of changing a pronunciation.
- Then say your own name (you, the teacher) in your mother tongue pronunciation and also with ‘English’ pron. Ask students how many sounds they can hear in the English version. Count them out aloud together. This is a great exercise, as it gets them looking at the individual sounds.
- On the pronunciation chart, point out the sounds of your name like a visual dictation. They have a go at saying each sound as you point (they will know the sounds to expect, as they have already said your name).
- Get students to come and point out the sounds in your name. The class says each sound after it has been pointed out. Do not discourage them if they touch sounds in the wrong order; that’s good. Get them to say it like that. If they touch the wrong sound, that’s also good; say that new sound, and let the class listen internally. Let them say your name using that ‘wrong’ sound, and then ask the student to find the correct sound.
- Invite students to come up and repeat this procedure for their own name. You can help by having them say their name aloud with the ‘English’ pronunciation, then asking the class how many sounds they hear. Ask the class to say each sound aloud together, before giving the pointer to a student and asking them to find the sounds on the chart. See what they can do, and help them where they cannot. Very soon you will have quite a few sounds in circulation, just by working with their names.
- In all subsequent lessons you can do something similar with any new vocabulary that comes up, or for any word or phrase where students are uncertain. Pointing it out on the chart does not make it correct, but the activity of locating the sound on the chart (always done with the pointer, and always with the rest of the class saying each sound) helps students see the link between what they are saying and what they are hearing, and how it is different from the other sounds. It helps them organize each pronunciation encounter.
The three levels
Ultimately, connected speech is our aim. However, we need to do a lot of work at three distinct levels of sound:
- level 1 – individual sounds
- level 2 – sounds joined together to make words (including word stress)
- level 3 – words joined together to make connected speech (including dropped and changing sounds, such as elision and assimilation)
The chart enables you to practise at all three levels, to examine a piece of connected speech, to slow it down and work on a word, and to slow that down further and work on a sound, and then to put it all back together again. This is the important step. After dissecting a phrase, I often say to my students, ‘Now in English,’ which makes them laugh, and they know it means they put it together and say it as a single energized flow. So, do as much micro practice as you like, but keep putting it back into context.
Use the chart to make your favourite pronunciation activities more vivid and memorable
Use the chart – and encourage students to use it, where appropriate – to:
- point out minimal pairs;
- show sounds that are left out, or linking sounds that are added, in a piece of connected speech;
- show how sounds are changed in the context of connected speech;
- track the pronunciation of each new word as it occurs;
- keep noticing the sound/spelling relationships;
- introduce new vocabulary, make grammatical corrections and give class instructions.
Different parts of a lesson
Grammar: Use the chart to point out the sound sequence of the words comprising the grammatical sequences. This allows the students to get their minds round the structure while getting their mouths round the muscular coordination. Practise using the structures both slowly, though with authentic connection, and rapidly, illustrating on the chart how some sounds may be omitted or changed.
Vocabulary:
- From the written word (on the board or in the book), ask the students to first say the word and then come to the chart to try to find the pronunciation, using the dictionary to check.
- You say the word, and then invite students to find the pronunciation on the chart.
- Introduce each new word by first pointing it out on the chart, and then help them to say it and shape it withouthaving heard it from you. This good for new vocabulary, and for memory retention, since they have to use the chart to work out the pronunciation for themselves.
Listening: Practice key words from the listening text on the chart. Use the chart to track the sounds of the chunk in which the key words occur. Illustrate words in isolation, and then immediately in their lexical and phonological context.
Visual dictation is the underlying activity
This means that a word, sound or phrase is pointed out on the chart, one sound at a time, by a student or the teacher. (If you are working with a monolingual class it may be beneficial to highlight typical pronunciation errors that occur in their L1.) The person pointing remains silent, but the rest of the class say each sound aloud as it is pointed out. After any correction, the word or phrase is said rapidly (‘In English!’) by the whole class.
Remember that there are four pointer modes
This means you can make four activities out of any one pronunciation activity. The four modes are:
- The teacher points while students say what is being pointed at (the teacher holds the pointer).
- A student speaks while the teacher points at what the student says (the teacher holds the pointer).
- A student points while the teacher or class say what is pointed at (the student holds the pointer).
- The teacher speaks while a student points at what the teacher says (the student holds the pointer).
Use the inner ear and inner mouth!
When you teach a new word or phrase, say it once aloud. Ask them to continue hearing it internally in their inner ear without any external sound. They don’t change the word or say it aloud, just let the word repeat in the mind’s ear. After just 3–5 seconds, ask them to prepare to say it aloud by practising it silently with their inner mouth, and then to actually say it aloud.
With very low levels, when doing this exercise, an additional step can be added: while listening to the word internally, simply count how many sounds it contains (for example, the word ‘how’ has 2 sounds, ‘many’ has 4 sounds, ‘contains’ has 7 sounds). Students should be encouraged to break the word down into the individual sounds, say them slowly, put the sounds back together to make up the word, listen to it again internally, and finally say it aloud. All these things are very quick to do once you’re used to it.
Have fun!
Students love it when they have a way of accessing and making sounds.
Further reading
Here are some further ways of introducing the phonetic chart to your class:
Pronunciation skills: What accent should I teach?
Pronunciation skills: Loosening the ’grip’ of L1 pronunciation
https://adrianpronchart.wordpress.com/2011/01/31/how-to-introduce-the-pron-chart-to-your-class/
Pronunciation skills with Adrian Underhill

We’ve brought together a series of videos and articles starring and authored by our ELT pronunciation expert Adrian Underhill and partnered them up with some tips and activities.
- 1
- 2
- 3
- 4
- 5
- 6
- 7
- 8
- 9
- 10
- 11
 Currently
reading
Currently
reading
Pronunciation skills: Integrating pronunciation into your daily class work
- 13
- 14
- 15
- 16
- 17


No comments yet